Universal Resource Scheduling is the scheduling engine in Microsoft Dynamics 365 Customer Engagement that allows you to enable scheduling for any entity, even custom entities. It’s used to find the best resource based on a set of different variables for example availability, skill set and location.
I know what you are thinking… Even custom entities? But how? What should I think about?
Well let me show you how I’ve done it!
This is the first of a series of articles about Universal Resource Scheduling (URS) and examples on how to customize and use it for custom entities
Enabling the entity for scheduling
I’ll start by navigating to Universal Resource Scheduling app – scroll down to Administration in the sitemap and this is where I find the Scheduling Setting and surprisingly enough choose Enable Resource Scheduling for Entities to proceed.
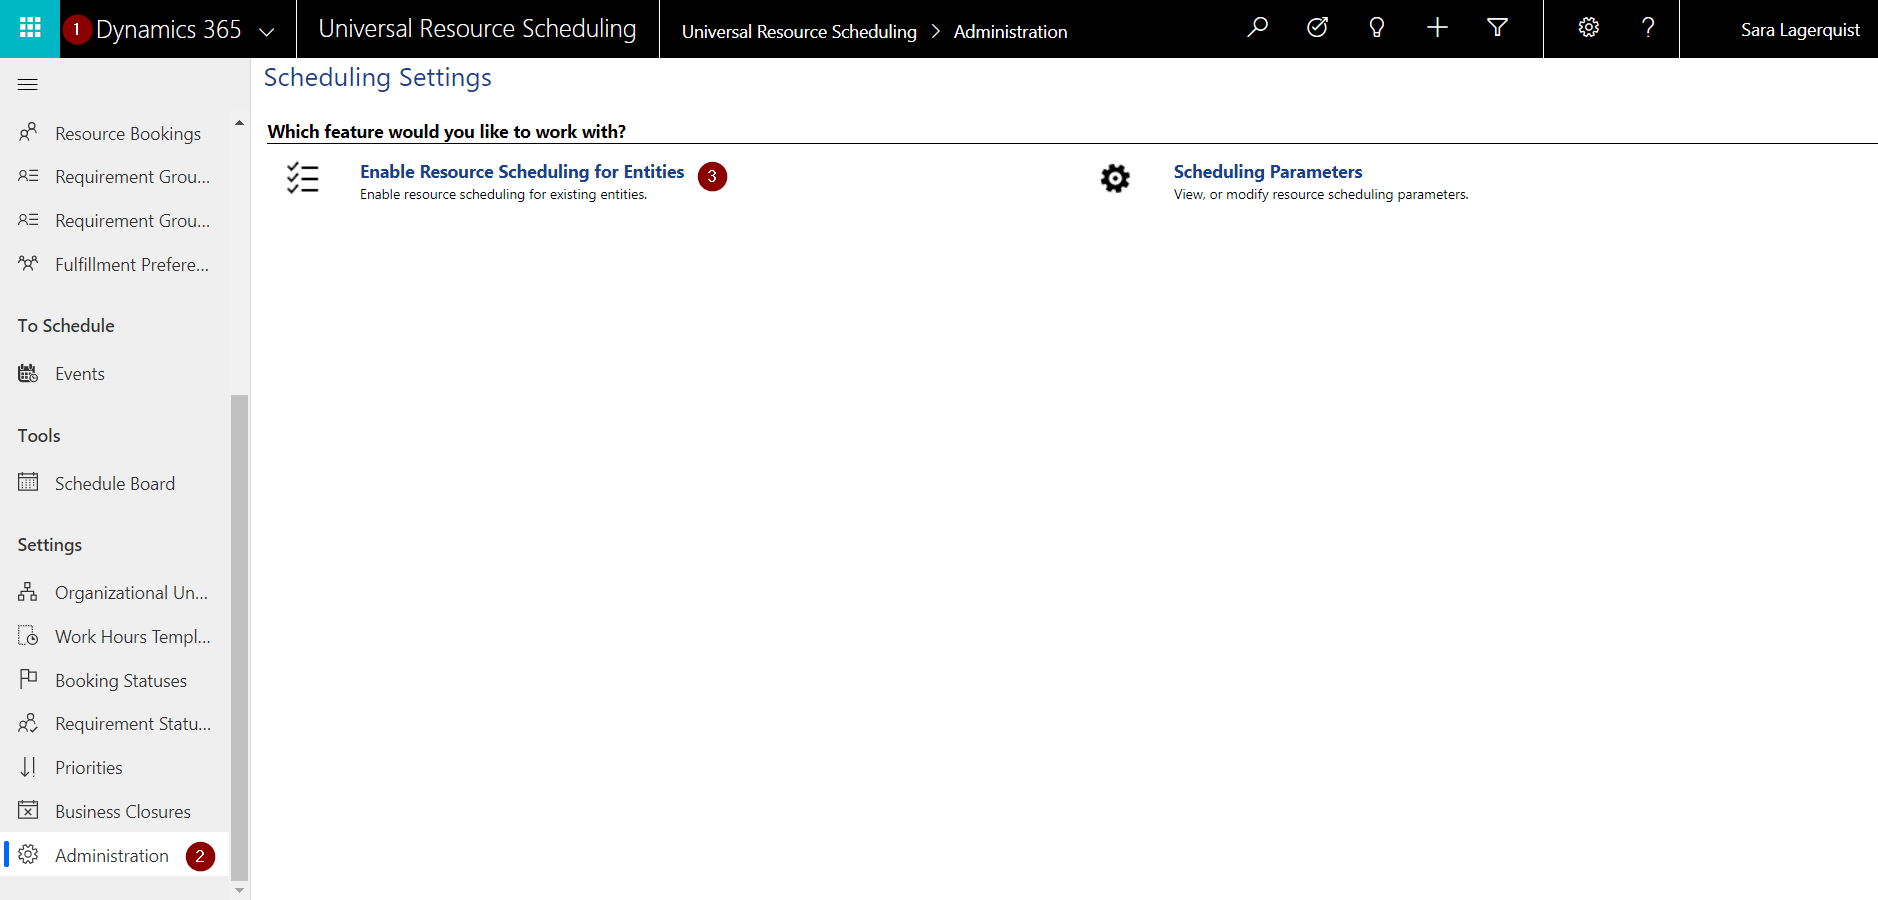
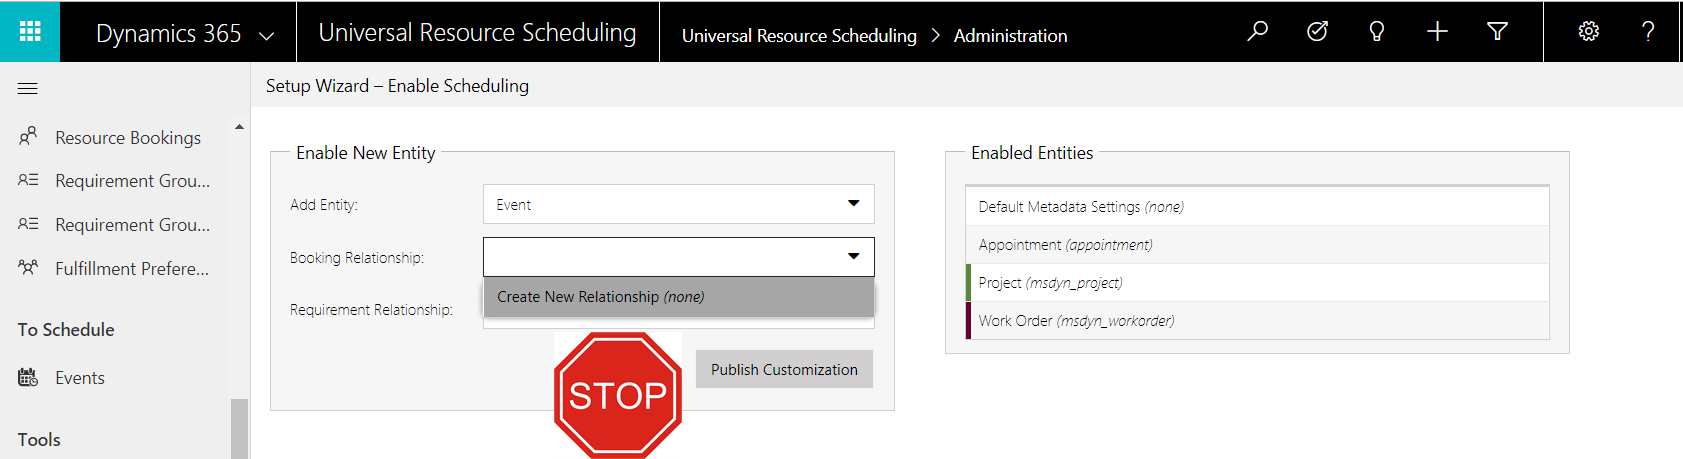
All entities enabled for scheduling need a Booking relationship and a Requirement relationship. These can be created directly in this stage by choosing Create new Relationship but in my opinion they never should be created here. Doing it here means they end up in the default solution and get the “new” prefix. This is not best practice. Don’t do it.
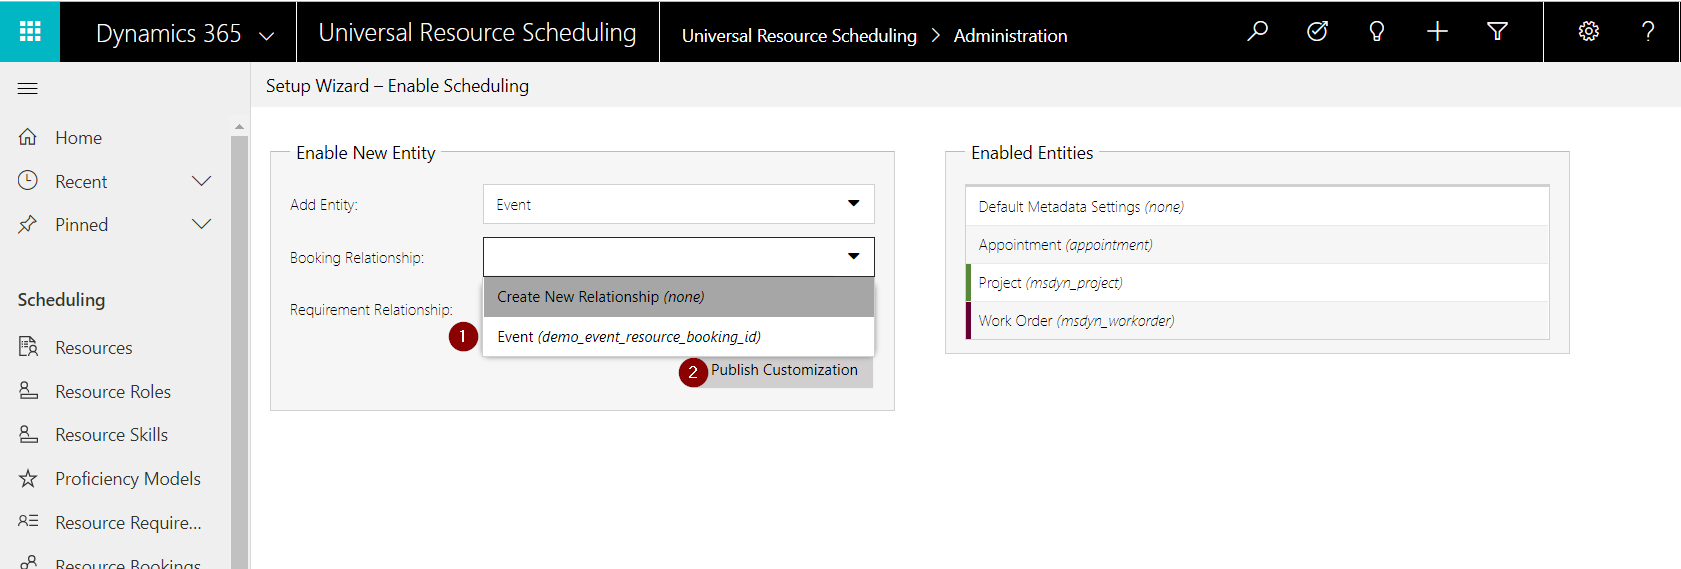
Instead I navigate to web.powerapps.com to create these relationships in a solution with a publisher (and therefore prefix) of my choice. I create a 1:N relationship to the Bookable Resource Booking entity and one 1:N relationship to the Resource Requirement entity.

When I navigate back to the setup wizard I find my relationship as an option next to the create new relationship option. Okay, LET’S PUBLISH!
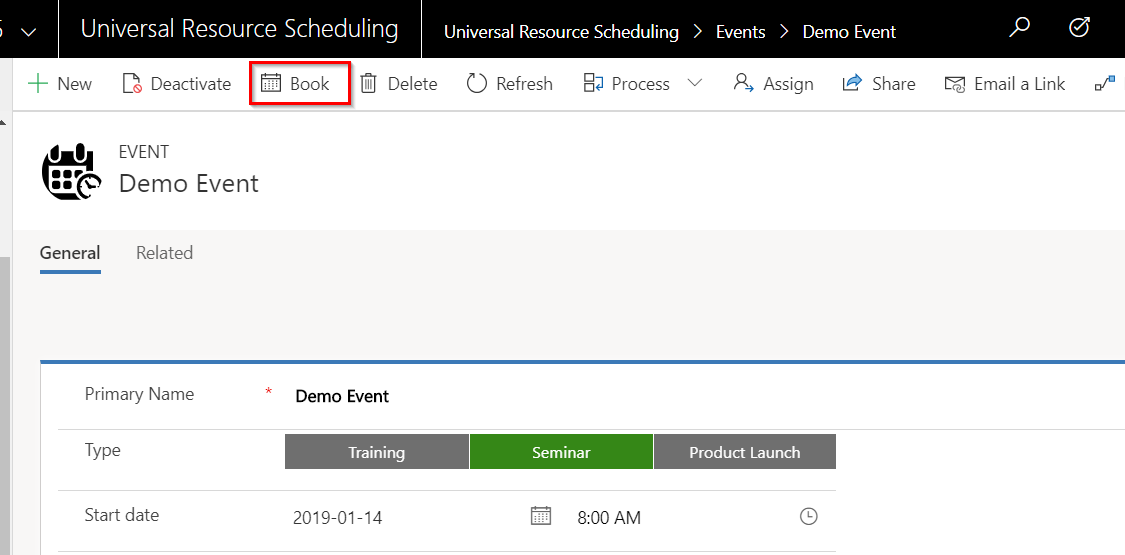
So by publishing I’ve gotten the Book option in the command bar to appear on my Event entity. This is a good start but wouldn’t help me much if I were to try to schedule it.
What happens if I would choose Book at this point is that a Resource Requirement would be created in the background and the Schedule Assistant would try to use the Resource Requirement to find the most suitable resource available for my Event. But the Resource Requirement would not contain any data from my Event entity and therefore not actually help me at all. So lets take a look at the Booking Setup Metadata and see what we can do to fix that.
The Booking Setup Metadata
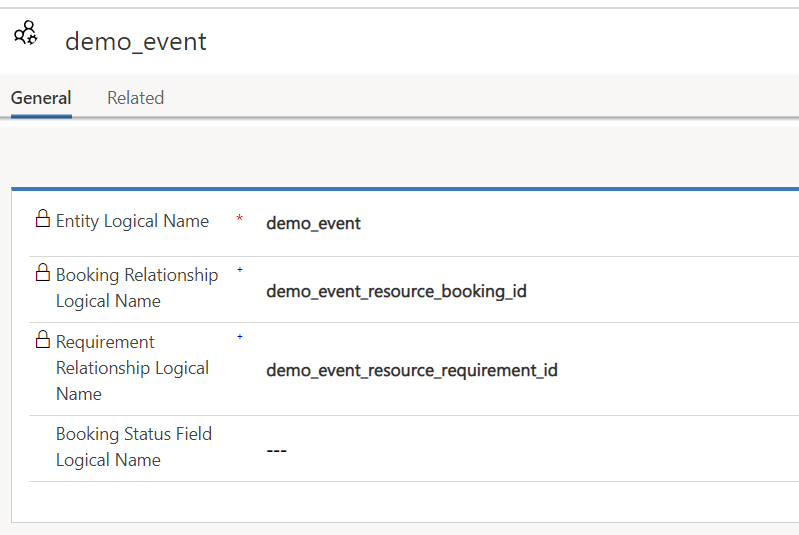
After I’ve pressed the Publish Customization button a pop-up window with the Booking Setup metadata appears. This record is divided in to three sections.
First section is populated with the information we just added when enabling the entity for scheduling. The only field not populated is the Booking Status Field Logical Name. There is a great blog post by Dan Gittler that describes the functionality regarding this setting and what you can do with it here so there really is no point of me going further in to it.
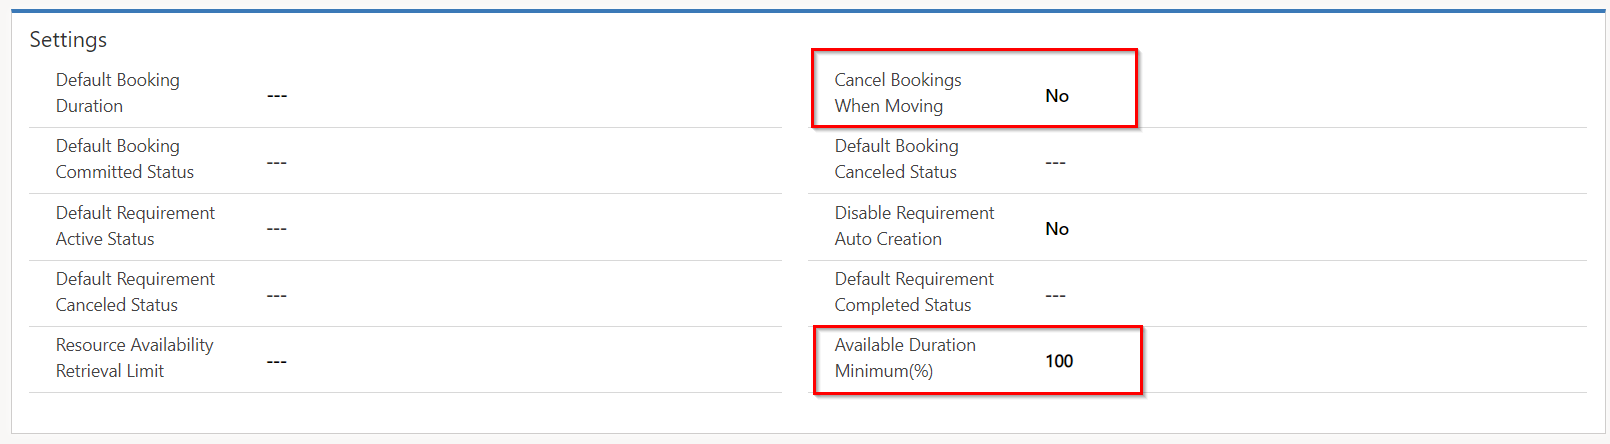
Most part of the second section is kind of self-explanatory. I do want to highlight two of my favorite settings (yes, don’t we all have favorite settings?) even though I will not make any changes to these settings right now:
Cancel bookings when moving : Selects whether, when moving open slots to the next day, to leave the old slots and change their status to “Cancel.” This makes a great impact to your statistics
Available Duration Minimum (%) : Select whether you want a resource to show up as a suggestion even though they are not available for the whole duration.
The last and third section is called Attribute Mapping and refers to what fields from my custom entity I want mapped to the automatically created Resource Requirement. For example since I don’t have Longitude on my Event entity that could be mapped with the Resource Requirement entity, that mapping option is unavailable.
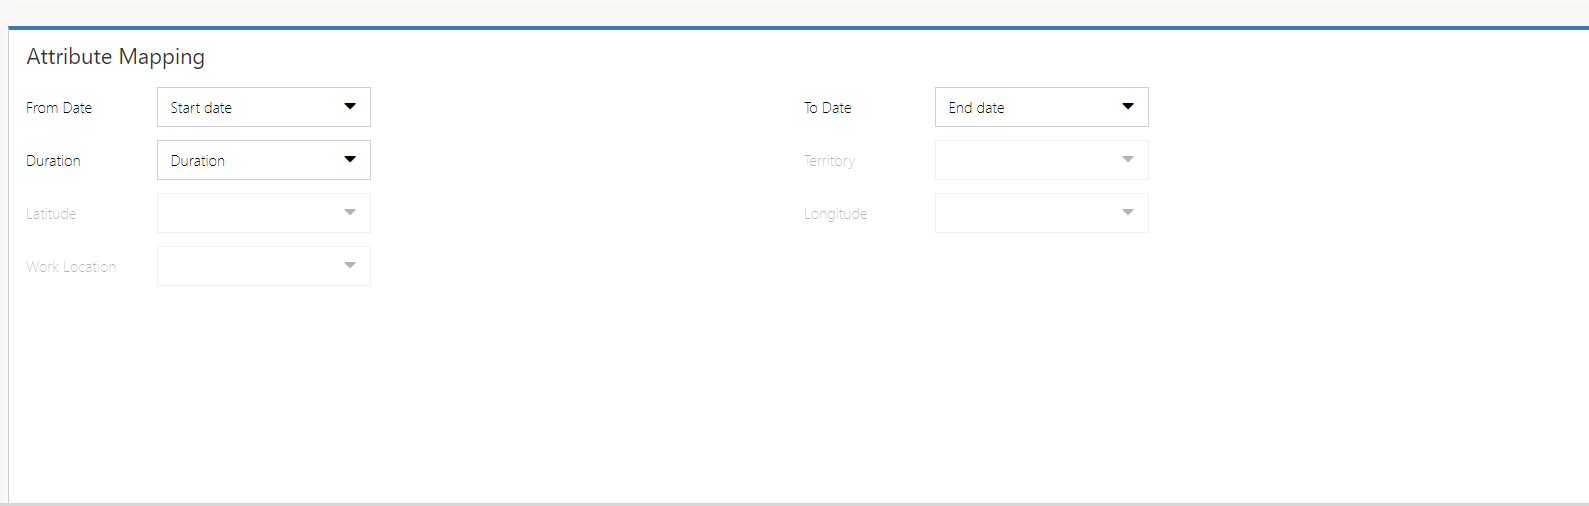
Using the Book button in the command bar on the Event form now would give me a slightly better result. The Schedule Assistant now applies all mapped attributes as filters when searching for a resource.

But the attribute mappings on the Booking Setup Metadata are few and static. You can add more by navigating to the solution (use the classic interface, the new powerapp interface does not handle mappings yet) and add more mappings there. In this picture I’ve added mapping for Resource Type as an example.
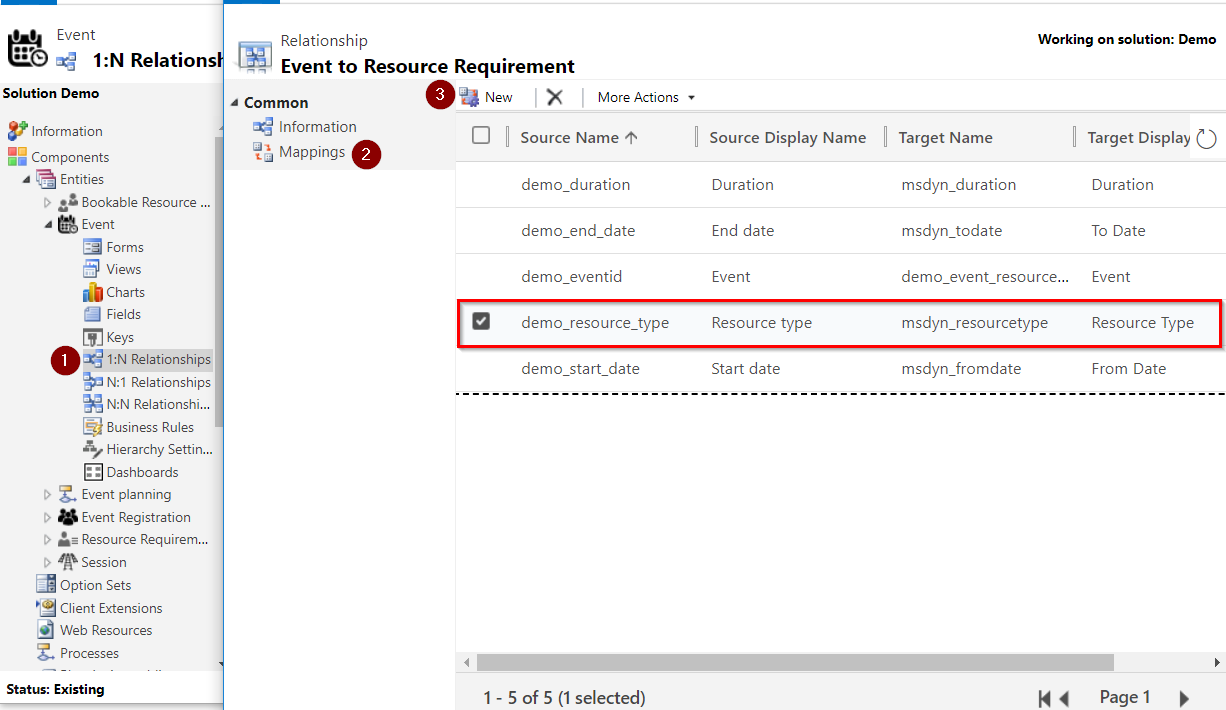
In several cases this might be enough to get the right result of resources suggested by the Scheduling Assistant. In my case it will not be.
What’s next?
In this article I’ve explained how to enable a custom entity for scheduling with a minimum amount of customization and still have a working solution where I can get find and book resources based on availability.
In my next blog post I will share how I narrow the result of available resources even more by filtering not only on availability but also on characteristics of the resource, something that can’t be done with standard mapping.


Very helpful information, How can we Sync the Booking(from Schedule Broad ) using custom entities to MS Outlook. I have already applied below settings still unable sync the booking to outlook.
System Settings > Click the Synchronization tab > Enable Synchronize resource bookings with Outlook. (System Administrator role required to execute this step)
On Resource Scheduling–>Navigate to Personalization Settings > Click on the Synchronization tab > Enable Synchronize resource bookings with Outlook
Thanks in advance
LikeLike